50th Birthday Musings

It’s weird to be half a century old.

Like many other people in today’s culture, there are various ways I’m struggling. But one great way to celebrate my birthday is taking time to appreciate the things I have. So, as I write these sentences, I’m going to resist the urge to add the negative qualifiers and just write the parts I’m grateful for. 

 My Mom is still alive, living somewhere safe, and routinely beating other really smart people at bridge. Like her mother, she’ll probably beat me at cards the night she leaves this world. I have several great partners who are all amazing in different ways. I’m in pretty good health, with little body pain and full mobility. I have decent, low-cost health care. I live in a tiny yurt I built myself near cool people who share my values. I managed to create a great life at a very low cost of living. I have a big network of friends in many different social scenes.  After taking a break from formal corporate tech work, I’m looking forward to getting back into VR and gaming, and it’s truly amazing how much one person can do now compared to when I started coding in the mid-1980s. I’m able to pursue a lot of my interests (too many!) and actually accomplish some things. I’m still able to attend two or three festivals a year, something I’ve been doing for over 20 years, in a camper van I converted myself. I’ve gotten way into 3D printing and can often model and print solutions to little problems I run into in just a few hours, which is a dream come true for a lifelong Legomaniac. And, after a brief hiatus for the pandemic, I now once again have a profoundly broken Saeco superautomatic espresso machine taking up too much space in my yurt. I’ve once again inherited adorable laying chickens. Can another Metro be far behind?

On my 50th birthday I’d like to thank all my family and friends that have helped make my life so amazing! I couldn’t have done it without you. 

Posted in Uncategorized | 2 Comments

Two Steps Forward

In my pursuit of the resurrection of my Conn Director alto sax, one problem was this Bundy mouthpiece, namely that not all of it is there.

These mouthpieces are made out of hard rubber. They start black, and the main reason they end up brown is because people incorrectly wash them with alcohol, which actually alters the rubber.

I wanted to try to fix this mouthpiece. Since it’s rubber, I decided to try using my 3D printer pen with TPU filament, which is a flexible filament used to make things like phone cases, RC car tires, etc. The hardness won’t be exactly the same as the original, but I bet I could at least get it playable.

First I cleaned the area off with…um…alcohol to make sure the new plastic would stick correctly. It turns out that, despite the fact that TPU is actually kind of like rubber, it wasn’t sticking well enough by itself directly to the rubber. Initially it looked like everything was working.

…but unfortunately it was consistently breaking off when I applied even a small amount of pressure to the joint.

The Good News is that the piece fits perfectly, so I ended up using Crazy Glue Gel to glue it back in. It still popped out at least two more times, but that was because I was putting too much pressure on it. I think once it’s shaped properly, it’s less likely to break during usage, though I know very little about sax mouthpieces and the stress they undergo, so I might be wrong. I doubt this could survive aggressive gnawing.

It’s not perfect yet, but it does actually play now, and probably better than the two 3D printed sax mouthpieces I have. After learning a little bit more about how the mouthpieces work, I also sanded down the facing of the 3D printed ones to get a better seal, and they are somewhat improved.

Coming from an oboe background with an intervening flirtation with bass clarinet, I’m pretty clueless about sax embouchure (including how to spell that). After watching a few videos and trying out some technique on all three mouthpieces with this 3D printed plastic tension ligature, thing thing that’s surprising me the most is how much air it takes to even get the reed to sound at all. I realize that classical mouthpieces take less air but can make less volume, and the reverse for jazz mouthpieces, but all three of the ones I have take what I feel is much too much air to get a good tone. What I really need is access to a known-good set of reeds and mouthpieces matched by someone who knows that they’re doing as a baseline. I’ll pursue that more aggressively once the horn is more functional. In the meantime I might try to get my hands on a known-good sax setup to see what it feels like.

Finally, I did a basic lube job on the sax from top to bottom, which helped with a lot of action problems. I love how intricate-yet-simple the whole Rube Goldberg setup is! I’ve also watched a bunch of sax restoration videos, so I have a fairly good idea of the high points. My partner Danielle offered to help with the effort and got me a $40 sax repair kit with pads, springs, rods, etc., that should get here today. I’m thinking it’s worth doing a full disassembly since the horn is janky enough that trying to do piecemeal repairs would likely be like chasing bubbles in wallpaper. So my plan is to at least replace all the pads and springs and whatever screws and rods really need it. Along the way I’ll check the alignment and level of all the holes and keys. I’m guessing it will take a while to get the whole thing done, but at this point I think starting almost from scratch is the most likely way to arrive at a functional, if ugly, instrument.

Posted in Uncategorized | 2 Comments

Meet Ernie, the Start of a Long Project

I’ve been getting back into woodwinds recently with the purchase of my Akai EWI Professional Solo. Doing the virtual wind thing had me hankering for the real thing, and while I played oboe in junior high 1) I can’t afford an oboe right now and 2) I’ve kind of always wanted to try sax.

Extensive trolling of local ads lead me to this janky old Conn Director alto sax, who for reasons I don’t completely understand, I’ve decided to call Ernie.

Ernie is in pretty bad shape. His exterior is dented and pitted, his mechanisms are squeaky and leaky, and the mouthpiece that came with him was missing a fatal chunk. But, with the help of a 3D printed mouthpiece, ligature, and a few reeds of various thicknesses, Ernie is making noises. To be fair, horrible noises that almost got me kicked out of Danielle’s trailer, but it’s a start.

I’m going to fix Ernie, for whom I paid the whopping sum of $35, up as much as thrift and time allow. My understanding is that the earlier 60s version of this horn had a pretty good reputation as a darker-sounding midrange sax. It’s hard to even read the serial number with all the corrosion , but it looks like he was probably put together outside of Conn’s “made badly in Mexico” phase. I’ll be documenting the repairs here.

The first two things I’ve done is ordered some new neck cork, which is actually waiting for me in the mailbox now, some 75w90 oil for lubing up all his bits, and some real reeds and a ligature. For sure there will be some re-padding and key adjustment as I go, but I’m gonna pretty much take the leaking-hot-tub-repair approach of fixing one thing, putting it back together, and seeing if it still leaks. Over time I may end up with a playable horn. If not, I will have learned a lot about sax maintenance and will be in a better place to make a more expensive purchase later.

Sax Rescue in Progess
Posted in Uncategorized | 2 Comments

Pan Meets the Pied Piper

For about 30 years I’ve had Yamaha’s most powerful electronic woodwind instrument in my possession. The combination of the WX-5 Wind Controller and the VL70-M tone module creates sounds entirely through mathematical modelling of the physics of the instrument without even the tiniest bit of pre-recorded sound to start with. I played oboe in Junior High, and it’s still the instrument I have the most practice with. I’ve gone through phases of interest over the years, but so far it hasn’t stuck. A big reason is that you have to have both of these instruments *and* an amp to actually make the sound in order to use it. It’s cumbersome and doesn’t reward the “leave it on the wall by your bed” method of getting myself to play that I’ve used to make some marginal progress on guitar/ukulele.

yamaha_wx5_vl70m

A major tragedy of the electronic wind instrument story is that, while there are a few EWIs still on the market from other manufacturers, the fully physically modeled wind synthesis system created by Yamaha has never been commercially updated. Many people still feel that, properly tweaked, it’s better than any existing system, but Yamaha no longer makes any of the tech and it’s become increasingly hard to get repairs or replacement on the secondary market. As far as I know, Yamaha has never made any effort to open-source the tech, which would be understandable if they were making money off of keeping it private. But they haven’t, and and I and many other have felt a deep sadness and a certain amount of anger for their choices. Some musicians, ecstatic about the power and flexibility of Yamaha’s offerings, created entire careers based on the instruments, and have found themselves up a shit creek when they inevitably wore out. I’ve wanted to do something about this for years, and I have several plans afoot, but for now, I realized that if I wanted to continue leveraging all those practice sessions from Junior High, I’d need a more modern instrument.

akai-pro-ewi-solo-play-music-anywhere

Enter the Akai EWI Professional Solo. While it doesn’t use the same math-based modeling that Yamaha does, it has a bunch of great features that solve a lot of my problems. First, it’s designed to be entirely stand-alone. It has the controller, the sound module, and a speaker all built into a beautiful frame that blends classical lines with a high-tech edge. It has 200 built-in instruments that use a more modern/traditional synthesis model where you start with a pre-recorded sound, then use various mathematical tricks to make it sound more live. This will be familiar to anyone with a history working with synthesizer keyboards or digital audio workstations. It has an excellent on-board battery life and no breakable moving parts except for the buttons on the back. Everything else is controlled through touch on the metal keys and controls, which makes it much more durable than the comparatively fragile WX-5. I’ve only had it for a few days, but so far the instruments are quite competent, if not entirely convincing, analogues of the real thing. I can use many of the techniques I learned in junior high to play the oboe solo from Star Wars, and most people couldn’t tell the difference. But, overall, the most important improvement is that I can pick it up and be playing in less than 10 seconds. Since I bought it, it’s never been far away, and it’s now my go-to activity when I have to wait a few minutes for something else. I’m already improving quickly and revitalizing my extremely rusty woodwind skills. I’m also just started to use it with Ableton Live for performance, recording, and looping, and am really looking forward to seeing where that goes. In addition, the Solo can be used to control the Yamaha VL70-M module, which means I get the best of both worlds.

And, it turns out, just in time. Our local Burn community has started The Flipside Philharmonic, a loosely organized group of former high school band players and wanna-bes to play a few tunes together at Flipside in 2023. I’ve just downloaded their songs, including Baby Elephant Walking, Ode to Joy, and Happy Birthday, and am about to look at sheet music semi-seriously for the first time since September 1991!

I’ll continue blogging about these two instrument setups as I go.

Posted in Uncategorized | Tagged , , , , , , , | Leave a comment

The Yurt Light Dome Project

Yurt Light Dome Pixelblaze Output Expander

I have really bad seasonal affective disorder, and generally struggle with keeping a regular schedule. Since discovering the Pixelblaze LED light controller, I hatched a scheme to make a light dome inside my yurt that would follow the sun cycle. I’ve now got a working version of the dome, and it’s super sweet! Right now the sun function simply changes all the LEDS to the same color over the day, but my long-term goal is to actually simulate the sun moving in an arc over the yurt.

I’m chose to use the WS2814 LEDS, which actually aren’t *fully* supported yet by Pixelblaze. As a result, I’ve had to use several hacks to get the lights working. The main problem is that these 4 color, 12V LEDs have the wrong color order for the Pixelblaze. Ben, the PixelMage, is aware of the problem as says he is adding support for these LEDS, but it’s taking a while because it’s much harder to make a simple web interface for every combination of 4 colors!

Hack #1 – Reverse the color scheme. The real problem is that PB doesn’t directly support all four colors on a four-color LED. Instead, it uses the while LED to take as much load as possible from the color LEDS, then only uses the color LEDS for final tinting. For instance, if you want a redish-grey, you might use RBG (1, 0.5, 0.5) for your colors. The PB looks at those numbers, subtracts the lowest number from all three, in this case 0.5, and sends that value to the white LED. This is more efficient because a single white LED at 0.5 takes up way less power than using all three colored ones to do the same thing. That leaves us with RGB (0.5,0,0), so the red LED is turned half-way on and the green and blue are left off. The problem on the WS2814 is that the blue and the white are reversed. If it were, say, the green and the red reversed, that would be easy to solve in software by just swapping the colors. But since the DERIVED white color is actually the blue, I had to reverse the entire algorithm to get it to work. So to get a certain blue value, you have to add the amount you want to ALL THREE COLOR SLOTS. But there is a problem. None of the values can go above 1.0. That means that you’re limited on how much blue you can use. When I made the code for this, which I’ve posted on the Pixelblaze website, I made three different overflow modes. The first doesn’t do anything, which means sometimes the LEDS just go out when they’re told to do something illegal. The second mode only changes the values that *would* have overflowed, and leaves the rest the same. The final mode divides all values by 2, which means the *relative* colors are the same, but only half as bright. The advantage of this scheme is that the number of LEDS you tell the Pixelblaze you have is correct (see below), so the 3D mapping functions still work correctly.

Hack #2 – Lie to the PB about how many LEDs you have. I turns out that if you tell the PB you have 3 color LEDS when you actually have 4-color ones, you can actually write all four colors directly. How? Well, for the first pixel, when you call rbg(), it write the first three bytes of the first physical pixel. When you call rgb for the second pixel, you’re writing the last byte of the first physical pixel and the first and second bytes of the second physical pixel. This is great because you can directly write the white values as well as the RGB ones, but to make it work, you have to lie to the PB about the number and type of LEDS you have. For instance, if you have 99 actual 4-color pixels, you have to tell the PB that you have 132 3-color pixels. This is all fine and dandy *until* you want to start using the 3D mapping functions. Now your map is wrong because the pixels the PB thinks it has don’t correspond to your actual pixels in 3D space. I had been using this technique until now because it gave me full color control. But now I want to make an actual shape move across the ceiling and I need the 3D mapping to work. I’ve temporarily moved back to Hack #1, because for the Sun Cycle function I don’t really need much blue light. However, I’d like full control for fun, ravey/psychedelic and possible gaming integrations, so now we’re onto:

Pixelblaze Yurt Light Dome

Hack #3 – The PixelBlaze Output Expander. I got one of these puppies because it really reduces the wiring I need to put up all 18 spokes of 33 LEDS for the dome. It’s shaped like an umbrella, and if I didn’t use the OX board I’d have to run a single data line through all 18 spokes in a row. The OX, among other things, has 8 separate channels. So now I’m using 6 of those channels to drive 3 spokes each, for a total of 18, which leaves me two to spare. I can start all the data connections up at the roof ring of the yurt, and I only have to make two connections for every three spokes. But, another feature of the OX board is that the code is open source! This means that I can make a custom firmware that fixes my lighting problem, which, after all, is just swapping two bytes before they’re written to the LEDS. The Good News is that I’ve gotten the ST IDE and programmer set up and already made the fix in code. The Bad News is that the company I ordered the Emulator/Programmer from sent me the wrong one, so I have to wait a few more days to find out if my terrible soldering job destroyed the interface on the OX or not. But, if I didn’t, I should finally have unfettered access to all colors and features of the PB with my not-quite-compatible WS2814s!

In the process of making the dome, I ended up with to some TM1814 LEDS. These are functionally very similar to the WS2814s I used, but are *completely* incompatible with PB. But, since I already have the firmware code setup, I bet I can make a driver for them as well!

Posted in Uncategorized | Tagged , , , , , , | 2 Comments

Four Days Without Power or Water

Austin was hit by a massive ice storm in early February. We lost power on Wednesday morning and didn’t get it back until Saturday. We live out of town on the edge of the barrio, so it’s not surprising others were prioritized before us. I know several friends who had to do five and six days without!

One big problem on The Farm where I live is that, since we’re on a well with a 240V pump, we lose water when we lose power. Combine that with the cold weather, and that means you can’t drip your pipes to protect them. This time we didn’t have too much damage as the really hard freeze only happened for one full day. I also had finished putting a new skirt on Danielle’s trailer, which really helps protect the pipes.

We’re all Burners or at least experienced campers, so we’re better equipped than most to handle this kind of situation. In the yurt, after finally admitting I couldn’t sleep through the power loss, I went and got my Olympic Wave 6 gas heater and scrounged up a propane bottle. This thing will keep the yurt at 60 o F+ for at least a week on the Low setting on one 5 gallon propane bottle. My water heater had already been broken before the storm, so dishes were already piled up in the sink. I also generally cook on an induction cooktop or my air fryer, so I switched over to whatever I could eat easily, which, in my world, isn’t much. I really like to cook, but also have very bad portion control for easy snacks, so most of the food I have requires cooking to be edible. Pretty soon I was out of fruit and easy veggies, and I also didn’t want to open the fridge very often.

Our friend Thomas, who often volunteers with Austin Street Medics and other volunteer orgs, had a generator up in running after a day or two to keep our four large chest freezers from going bad. The whole experience was dark and depressing, especially because I have really bad seasonal affective disorder that I usually fight with lots of indoor LED lighting. In fact, I have a completely different Yurt Light Dome project I’ve been working on for months to help with that problem. More on that in another post.

The Wins:

Half of my tiny fridge capacity is in my van, which has minimal solar power and a 12V fridge with a Danfoss compressor. Even in the middle of winter, the 400 watts of solar is enough to keep things cold. The fact that the fridge doesn’t have to work as hard in the cold weather helps. This means I had a place to move some items if needed.

Thomas kept our deep freezes running, so we had a place to move freezer stuff. This was complements of a dual-fuel generator running on propane. This is an example of real resiliency, as he has *two* generators and neither one was initially working due to bad fuel. However, propane doesn’t need a carb, so by switching that second generator over he was able to get it working. He also has a large rolling battery for exactly these situations so he could charge that, then rotate it between the freezers. Huge props to Thomas for keeping all that shit running in the middle of a crisis!

The yurt stayed warm. Thanks to the used fiberglass insulation I installed last summer and weatherproofing improvements, the Wave 6 heater was able to keep things in the 60s without even running all the time. It’s a bit of a chore to light, you have to hold the button down for 30 seconds for the thermocouple to stay on, but it provides safe, efficient heat with no electrical power. Thomas also shared a small Buddy space heater with Danielle so she could keep her bedroom warm.

Danielle had propane heating and a gas stove on a big tank, so she was able to cook and heat throughout. While I was almost on the verge of installing one of the many camping cooktops I had in the yurt, it just made sense, especially with the cold, to cook at Danielle’s place instead.

Junior, my 2007 Dodge Sprinter off-grid stealth conversion, is able to act a generator in emergencies. There are a lot of problems with running the 3.0 diesel at idle, including clogging the diesel particle filter and possible engine damage, but it works. My house batteries are currently shit (see below), but they exist, and I have a 3000 watt true sine wave inverter, so I can provide enough power to run a 15A circuit when the engine is on. I ran then van for at least a few hours every day, and luckily had just topped up the tank. At $4.20 gallon, it’s a super inefficient and expensive way to create power, but it works in a pinch. The power from Junior was mostly used to charge phone power banks and keep the fridges from totally melting down, and to occasionally provide a few hours of pseudo-normalcy when things got really dark psychologically. Running the engine also charges the house batteries, which can then be used to run small things for short periods of time. If I needed to, I could also have run the heater to warm that space as an emergency shelter. Although there area lot of minor problems with Junior, and he’s frequently full of junk, he’s a very good resource to have for off-grid living, and that’s by design.

Friends, lovers, and helpers. Lots of people came through for us during out outage in the few places we needed help. Thanks to everyone who lent a hand, or offered!

The Problems:

Neither Danielle or I has any kind of fossil fuel generator. The fact that Thomas had his really helped, but considering the fact between us Danielle and I have two Sprinter camper conversions and frequently go to Burns and camping, it would really help if we had at least a 2000w unit for these kinds of emergencies. If we had had one, we could have probably run her trailer and my yurt most of our waking hours as long as we didn’t use any of the power for heating.

The house battery pack in the van is garbage. It consists of four very old 6V golf cart batteries that have been on their last legs for years and a spare car starter battery I inherited from my Mom. The voltage sags badly with any kind of non-trivial load, so the batteries can’t handle, say, a small heater or induction stove even though the rest of the system can. If I want to use heavier loads, I have to fire up the engine for the duration. I only have 400 watts of solar on the van, which is barely enough to stay ahead of the fridge in winter with the lower sunlight levels, but if I had a bigger battery, that extra power would add up and potentially last for days in exactly this kind of pinch. I don’t regret cheaping out on the batts initially, because I suspected I wouldn’t use the van as much as I wanted, and I was right. The system has worked for many years now, but I haven’t taken it on the road except to local Burn events for several years. However, this event and other like it last winter have convinced me it’s time to invest in a beefier battery setup, probably a self-built LiPo rig. I can’t afford that right now, but it definitely needs to go into the budget. If I’d had a system like that during the storm, I would have been able to have some form of continuous power throughout even if we didn’t have a small generator.

Being without water is worse than being without E-! The fact that our well pump won’t work without grid power is a huge failure in what’s otherwise a very resilient setup out here at The Farm. We already have plans to fix this, but it will take a while with all the other upgrade projects and limited funds. Now, I ran the water system in the yurt off of a 12V system for over five years that could make 5 gallons of water last for *two weeks* of dish and hand washing. Our well water isn’t potable, so we already bring our drinking water in from friend’s places and run it through a Berkey filter. Despite still having this setup, and the fact that I got it into the yurt on the last night of darkness, I never actually got it fully set up because it’s a little too hard right now. The biggest issue is providing power, as I used to run it off of a 12V converter from grid power, and I didn’t have any extra 12V batts lying around I could use.

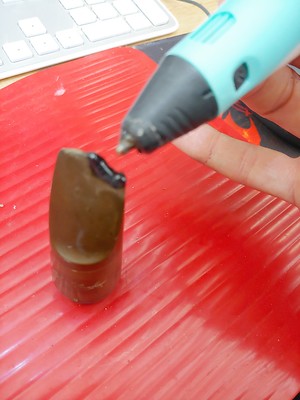
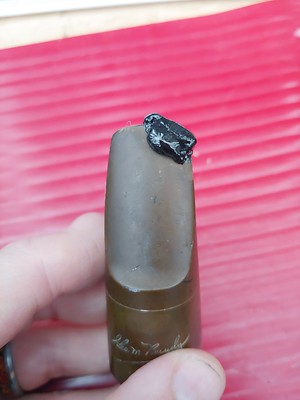
However, this brings us to a good generalized tool that would help with all of this. Both Thomas and I have extensive collections of 18V rechargeable tools. Mine are Ryobi, and his are Makita. Many things that run on 12V can actually use 18V unmodified, and for those things that need the actual 12V, it’s trivial to get chips that will downstep without much power loss. I have some solution to most of my power gear that can work on 12V, but I didn’t have enough capacity or number of batts for that to help much during this emergency. One great solution would be a way to patch a number of these batts together and/or make a way to plug them into stuff that uses 12V. One solution that I’ve used before is these simple 3D printed caps for Ryobi batteries. Combined with wire they provide an easy way to get that power somewhere else:

https://www.thingiverse.com/thing:1194867: Four Days Without Power or Water

I only have about four or five of the Ryobi batts, but Thomas has a lot more of the Makita ones, and making adapters is pretty easy. The ability to run everything small like lights, phones, maybe even computers off of those is very appealing, and would be easy to set up. That would justify buying, or even making, more of them. It wouldn’t let me weasel out of getting a bigger portable battery system of the yurt or van, but it’s a resource I didn’t really use during past emergencies, and it could solve a *lot* of problems. The larger house batts would provide a better aH/Electronic Expense ratio, but they would fill in a lot of gaps.

The Takeaway:

We were pretty well equipped to handle 4 days without power. Having propane backups really saved us, as did one big generator and house battery. The low hanging fruit of solutions to problems are

  1. A 2000-3000 watt generator
  2. At least one large house battery for the van/yurt that can run things for several days
  3. A way to keep some kind of running water happening both at a Farm-wide and at a per-building level with no grid power
  4. A modular system for combining and possible down-regulating 18V tool batteries to use to run 12V gear.
  5. Whatever small chances are needed to get my previous 12V water system portable and easy to set up, possibly even built into the yurt (there’s already one in the van, but it was too junked out to use) so that it’s trivial to switch over when needed.

Posted in Uncategorized | Leave a comment

Micro Star Destroyer Pill Cutter Mod

I’ve been needing to halve and quarter more pills recently, so I made this upgrade for my pill cutter that just happens to look like a half-finished Imperial Star Destroyer.

0620221408a
0620221506
Posted in Uncategorized | Tagged , , | Leave a comment

PixelBlazifying my American Experience

Costco had a great deal on these American Lighting Color Changing Neon Flex Lights for 50% off, which is $15 a piece! My Burner friend Thomas had recommended the PixelBlaze controllers for LED projects, because they’re pretty cheap ($35) and have a fully programmable web-based interface for all kinds of Custom Controller Craziness! Once I got the two, I had to figure out how to bring them together. There was one major Gotcha about this project, so I decided to write it up to save others the trouble.

These strip lights use 24V power and WS2812 RGB chips. They only have power, ground, and the data signal, there’s no clock line. The PixelBlaze can run off of any 5V power supply, including the integrated micro-USB connector, which is what I decided to use. So the question is, how do we get them together?

The biggest Gotcha is that inside the built-in controller for the strip lights, THEY SWITCH THE VCC AND GROUND WIRES INSIDE THE CONTROLLER. This is *super* bad design, and they’re definitely going on my Engineering Hit List, because this terrible choice could easily have lead me to fry my new PixelBlaze.

So, coming FROM the power supply and INTO the controller, the Black wire is Vcc and the Grey wire is GND. But coming OUT of the controller and going INTO the LED strip, THEY ARE REVERSED! Grey is VCC and Black is GND! After several hours being totally confused about why the setup wasn’t working, my partner Danielle suggested we cut one of the controllers open to see WTF was going on. I used my tiny Swiss Army Knife to carefully break open the seal around the edge to get it apart. This was the result.

Controller Closeup

After dispatching one of my idle Paramilitary Clown Death Squads to deal with the designers and their families, I was able to figure out the RIGHT way to wire it to the PixelBlaze to get everything working!

I have heard Field Reports that some other light strips with of this same model use different colored wires for the power and ground. The Moral of the Story is to check the polarity coming from the power supply, and look inside the controller to see what’s going on.

First I had to solder on the green 4-pin header for the PixelBlaze V3. This was quite easy.

This is the final wiring setup. The main thing to notice is that on the 24 VDC Power side, BLACK is VCC and GREY is GND. You want to hook the GND wire for the Pixelblaze to the GREY GND wire on THIS SIDE of the connection, AND to the BLACK WIRE going to the LED strip. On the 24 VDC side the BLACK wire is Vcc, and you want to connect that ONLY to the GREY wire going to the LED strip.

0614221704

I followed the excellent directions on the Pixel Mage’s site here. These are the LED settings that worked for me. I though initially that these were RGBW lights, but I think that’s the Pro version. Instead the RGB setting seems to be the right one. It appears this strip has 50 addressable locations, but if you had a longer strand you could obviously do more.

Screen Shot 2022-06-14 at 5.39.52 PM

And BOOM! Let there be light!

PixelBlaze V3 running American Lighting Neon Strip Light
It works!

I haven’t even started looking over all the cool things you can program a PixelBlaze to do. I’d like to seriously upgrade the lighting in the yurt, and one thing I want is a fake sun that tracks across the dome that’s bright enough to help with SAD in the winter and let me block out the roof ring to improve cooling in the summer, but that’s A PROJECT FOR ANOTHER DAY!

Posted in Uncategorized | Tagged , , , , , , , , | Leave a comment

Upgrading My Burner Storage

Flipside 2022 marks my 20th year as a Burner! My highly refined Burn checklist hovers around 150 items, but despite my experience I still find packing for Burns to be super stressful and difficult. I think one reason might be that it reminds me of all the times I was forced to move as a kid. It’s also just a lot of stuff to keep track of, and it sucks to need something at a Burn that you forgot. A big part, though, is that I’m just not good with Big Overwhelming Lists. Also, even though I use the same 5 or 6 containers, I’ve never actually standardized what goes where. I also tend to use my Big Suitcase a lot, which holds too much from too many different categories, takes up a huge amount of space, and tends to get covered with other items when closed. So I decided it was time to re-do my Burn packing setup when it’s *NOT* the last minute to improve my experience.

I really like the Costco clear storage totes! They come in two sizes, and it’s really easy to see what’s inside. I’ve standardized most of my own extensive storage into them, and it’s much easier to find things than it used to be. For Burn events I think the thing I need the most are more of the smaller ones. I’m also a little tempted to get some cheap plastic shelf organizers, but I don’t like the fact that there’s not modular. With the clear totes, I can make a frame to turn them *into* storage shelves if I want, but it’s really useful to have them work independent of any other frame. This is my first stab at new categories:

Old Storage LocationsNew Locations
Small SuitcaseSmall Suitcase
Large SuitcaseToiletries Tub
Tool ToteGadget Tub
SelfCostume Tub
Kitchen GearKitchen Tub
DanielleCooler
CamelbakVan Fridge
Toiletries BagVan Freezer
Van BasketVolunteering Tub
CoolerCleaning Tub
Van GloveboxMedical Tub
Tool Tub
Camelbak
Art Tub
Camp Stuff Tub
Shoe Tub
Laundry Bag
7 Gallon Jug
5 Gallon Jug
1 Gallon Jug
Firedancing Tub
Crafting Tub
Gifting Tub
Hat Tub
Hot Weather Tub

A bonus would be if I could use the same tubs in my normal life as much as possible, so instead of hunting everywhere for things, I can just grab them and throw them in the van.

Another thing that would help me get ready is breaking that process down into tasks with their own time estimates and priorities and critical path. Task and time management are weaknesses of mine, but recently I’ve been using Goalist to increase my discipline. So far it’s working really well, I find myself using it just about every day and steadily getting better after just a few days of being sort-of confused. This is the best record I’ve had for any task management system, and I’m hoping it will increase my efficiency and reduce the time stress in my life.

Posted in Uncategorized | Leave a comment

Front Men, Side Control, and Toilet Roll Reverb

I fixed the spring reverb on this Fender Frontman amp and my Alvarez’s pre-amp faceplate.

0318211619~2

I found this Fender Frontman Reverb amp at Goodwill many years ago, and it’s been sitting in storage every since. It was pretty dusty, but the main problem was that the reverb sounded really hum-ey when it was turned up, even with no signal to drive it. I decided to take it apart to see if I could figure out what was wrong.

There had clearly been some water damage at some point in its history, but most of the electronics and the speaker looked ok. But what was this…thing….stuck to the back of the speaker?

I don’t know much about amps, but it turns out this is the spring reverb unit, which actually has two slinky-like springs in it to generate the reverb. I looked online for a few days to see if I could find a teardown video or pictures for this amp, but struck out. Evidently it’s fairly uncommon. My friend turned me onto the A Rustic Kegger in the Woods, a FB group about guitar amp repair. They were able to confirm that no, the spring reverb should *not* be attached to the back of the speaker! That’s the place in the amp *most* likely to generate noise! However, finding another spring reverb on the web confirmed that yes, in fact, this component *is* supposed to live inside a toilet roll!

We assembled forensic evidence to figure out where it *should* go. It was attached using double-sided tape. Newer Fender Frontman amps have the reverb on the bottom of the case in its own metal box. Based on that and the way the cords were clipped, the only place it could actually fit well was vertically on the side. We’re thinking that what happened was the amp got hot and melted the glue, and the reverb unit, which contains a decent amount of steel, fell off and then snapped onto the magnet. The glue hardened again when it cooled off, and viola, there it was! I returned it to what looked like its original location, and it definitely improved the sound:

0322210143

But to test the amp, I needed a guitar with electric pickups. I don’t own a purely electric guitar, but I *do* own a nice Koa wood Alvarez acoustic with a cheap set of pickups and pre-amp in it. The guitar itself is well protected in padded hard-case, but something terrible seemed to have happened to the pre-amp faceplate! Not only was the whole unit rattling around inside the guitar, but when I tried to super-glue the plate back together, it would break somewhere else. And several of the pieces were bent enough that they didn’t match up. I can only assume this is heat damage, or simply bad plastic.

0321211428

I looked online to see if I could get a replacement cover. But it turns out that evidently Alvarez swaps their models on cheap pre-amps all the time, and it’s almost impossible to find any evidence this model ever existed!

I was annoyed that it would take longer to test the amp, but I also saw an opportunity to increase my street cred for 3D design and printing. I pulled out my calipers and started measuring!

0321211428a

I did a few 1 mm thin prints first to verify my measurements. But holding up to the original and sliding it onto the pre-amp, I was able to find the few places where I was a little off. This is inevitable working at these tolerances. After a few test prints and corrections, I was ready to try a full faceplate at prototype resolution of .28 mm layer height. Everything went well, I cleaned off the brim and tried it out!

Screen Shot 2021-03-26 at 1.09.34 PM

Everything fit perfectly, except that the grooves for the EQ sliders were just *slightly* too narrow at that rougher resolution. I filed those out by hand, and then made the gaps slightly bigger on the model for future prints. Other than that, it works at advertised, and now I could proceed with my testing without the pickup faceplate disintegrating on thumpy bass notes!

0322210116

The original faceplate had writing on it for all the controls, and I’d like to produce a nicer plate with that included. One method I haven’t tried yet is printing a model with two colors by switching out the filament half-way through. I kind of like the pearlescent quality of the transparent PETG, but, as you can see, the original faceplate was a dark grey with white writing. I also have some black TPU filament, so what I might do is print the plate with that, then add the writing with the PETG. This would also be an opportunity to integrate my graphic design skills with 3D printing. I use Affinity Designer for vector graphics, and it’s much better than Fusion 360 for doing fancy art and text. So I think I’m gonna design the faceplate graphics in that, then export the mesh into Fusion 360 and emboss it onto the surface. That will be a fun project!

Posted in Uncategorized | Leave a comment